Baby Steps to Backbone.js: Starting up
Many times then I speak to people regarding usage of any kind of MV* frameworks on front-end I hear common objection: “but we already have a lot of code written on jQuery/Dojo/Whatever, I think usage of additional framework would be impossible”. This is not actually true. Backbone is very lightweight and could fit into any existing application.
Baby steps strategy is the most efficient way of trying the things. You start with something really small, enhance it over the time and expand for other application areas. Now, let’s imagine you got an existing application, you wish to start using Backbone.js to improve that. I would like to show you, that it’s absolutely possible.
Suppose, you want to add a feedback form for your app. Let’s implement that with Backbone.js.
Applications, Models, Views
There are no such thing as `Controller` in Backbone.js. But you have to have some kind of entry point, some place with `main()` function inside. I got used to call this place - Application. Basically, the application is a module, which is responsible for initialization of model, instantiation of view, rendering the view.
The `Model` is object that holds the data. It could be fetched and persisted back to server.
And finally view is object that produces markup, hooking up events and updates View from data in Model and otherwise.
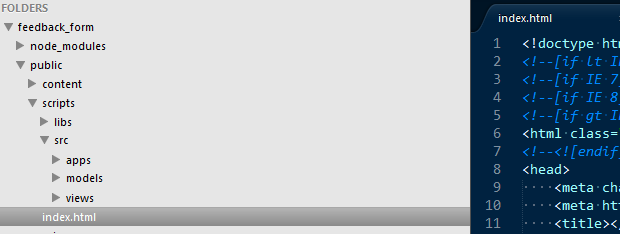
We are going to create all three things. It makes a lot of sense to breakdown the folder structure of to reflect logical meaning of each entity of Backbone application. So, we’ll create 3 folders for apps, models and views.
Setup Backbone.js
On a target html page we should place 2 additional script tags.
<script src="/scripts/libs/underscore.js"></script>
<script src="/scripts/libs/backbone.js"></script>
Besides of that, let’s add one more div. The one that application will be using for rendering views.
<div id="app" class="container"></div>
Application entry point
Let’s create a new file in `apps` folder and call it `FeedbackFormApp.js`. It would be very simple.
$(function () {
    var model = new Feedback();
    var view = new FeedbackFormView ({model: model});

    $('#app').html(view.render().el);
});
Then DOM is ready, we instantiate new model object and view and render the form into DOM element with id - app.
Feedback model
Now, let’s define a model. Create a new file in models folder and call it `Feedback.js`.
The model refects the data we are collecting/displaying to user and it’s typically stored on server (sometimes on localstorage). Feedback model will include 3 attributes: email of user, his web site and the feedback text. In terms of Backbone.js that would mean.
var Feedback = Backbone.Model.extend({

    url: '/feedback',

    defaults: {
        'email': '',
        'website': '',
        'feedback': ''
    }

});
The url property of model object is used by Backbone for persisting object to server. The default are defaults values for model attributes.
Rendering the view
The most interesting things in Backbone.js app is happening in Views. Add new file to `views` folder - FeedbackView.js.
The skeleton of view would look like this:
var FeedbackFormView = Backbone.View.extend({
   className: 'row',

    render: function () {
        return this;
    }
});
This view, does do nothing. So, let make it render the template. The template would be very simple form.
There are different approaches, there to actually place the markup. It’s possible to place it in the same .html file where view starts and extract it by jQuery, it’s possible to place to separate file and load it asynchronously by $.get(). But, according to baby steps scenario - we’ll place it directly to .js file. So, inside the view we’ll add property called template.
template: '\
 <form>\
  <legend>Share the feedback</legend>\
  <div class="control-group">\
   <label>Email</label>\
   <input type="text" id="email" placeholder="Your email address...">\
  </div>\
  <div class="control-group">\
   <label>Web site</label>\
   <input type="text" id="website" placeholder="Your website...">\
  </div>\
  <div class="control-group">\
  <label>Feedback</label>\
  <textarea id="feedback" class="input-xxlarge" placeholder="Feedback text..." rows="6"></textarea>\
  </div>\
  <button type="submit" id="submit" class="btn">Submit</button>\
 </form>\
',
And render method, would be:
render: function () {
    this.$el.html(this.template);

    return this;
}
First test
Basically, we are ready to see some results. Modify the target view by adding references to model and view.
<script src="/scripts/src/models/Feedback.js"></script>
<script src="/scripts/src/views/FeedbackFormView.js"></script>
<script src="/scripts/src/apps/FeedbackFormApp.js"></script>
Fire up the application and go to target page. You should be able to see something like this (for styles I use Twitter Bootstrap here).
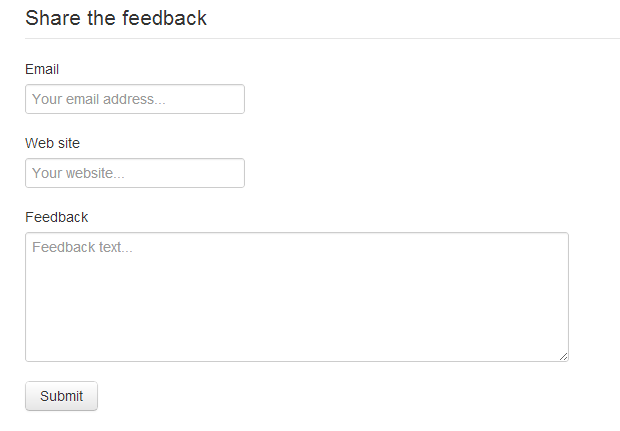
If you see the form on screen, it means application started properly.
Submitting the form
We enter the data into input fields and as soon as data is in-place we are ready to submit. It means we have to catch an event of `Submit` button click and store the model to server.
To explain to Backbone.js that you interested in particular DOM event, you need to add another property to view. It is called events.
events: {
    'click #submit': 'submitClicked'
},
You can read it as - if click happed to element with id `submit`, call function submitClicked.
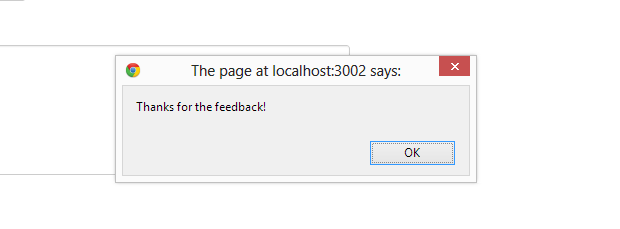
submitClicked: function (e) {
    e.preventDefault();

    var options = {
        success: function () {
            alert('Thanks for the feedback!');
        },
        error: function () {
            alert('Opps, your feedback has not been submitted, please try again.');
        }
    };

    var feedback = {
        email: this.$('#email').val(),
        website:  this.$('#website').val(),
        feedback: this.$('#feedback').val()
    };

    this.model.save(feedback, options);
}
What it does, is first of all prevent the default behavior of event. So, the form would not be actually posted to server. Second, it prepares the options object’s with success and error handlers. After we initialize all attributes with actual values from corresponding inputs/textbox. And finally we call model.save().
Second test
Fire up application again. Now, if have properly set-up server side to receive the HTTP post call to `/feedback` you actually post first feedback.
From my server trace, I can see that new object is received.

Now, it’s the server job to put to storage, allocate the id etc.
Conclusions
In this first baby step, I just showed how it’s possible to adopt Backbone.js for existing apps. It does not make a lot of sense to re-write your existing code with Backbone.js, but new widgets/elements/applications could be created with Backbone, having a benefit of it’s structural approach.
I’ll go on with baby steps, showing other features of Backbone.js.
Many times then I speak to people regarding usage of any kind of MV* frameworks on front-end I hear common objection: “but we already have a lot of code written on jQuery/Dojo/Whatever, I think usage of additional framework would be impossible”. This is not actually true. Backbone is very lightweight and could fit into any existing application.
Baby steps strategy is the most efficient way of trying the things. You start with something really small, enhance it over the time and expand for other application areas. Now, let’s imagine you got an existing application, you wish to start using Backbone.js to improve that. I would like to show you, that it’s absolutely possible.
Suppose, you want to add a feedback form for your app. Let’s implement that with Backbone.js.
Applications, Models, Views
There are no such thing as `Controller` in Backbone.js. But you have to have some kind of entry point, some place with `main()` function inside. I got used to call this place - Application. Basically, the application is a module, which is responsible for initialization of model, instantiation of view, rendering the view.
The `Model` is object that holds the data. It could be fetched and persisted back to server.
And finally view is object that produces markup, hooking up events and updates View from data in Model and otherwise.
We are going to create all three things. It makes a lot of sense to breakdown the folder structure of to reflect logical meaning of each entity of Backbone application. So, we’ll create 3 folders for apps, models and views.
Setup Backbone.js
On a target html page we should place 2 additional script tags.
<script src="/scripts/libs/underscore.js"></script>
<script src="/scripts/libs/backbone.js"></script>
Besides of that, let’s add one more div. The one that application will be using for rendering views.
<div id="app" class="container"></div>
Application entry point
Let’s create a new file in `apps` folder and call it `FeedbackFormApp.js`. It would be very simple.
$(function () {
var model = new Feedback();
var view = new FeedbackFormView ({model: model});
$('#app').html(view.render().el);
});
Then DOM is ready, we instantiate new model object and view and render the form into DOM element with id - app.
Feedback model
Now, let’s define a model. Create a new file in models folder and call it `Feedback.js`.
The model refects the data we are collecting/displaying to user and it’s typically stored on server (sometimes on localstorage). Feedback model will include 3 attributes: email of user, his web site and the feedback text. In terms of Backbone.js that would mean.
var Feedback = Backbone.Model.extend({
url: '/feedback',
defaults: {
'email': '',
'website': '',
'feedback': ''
}
});
The url property of model object is used by Backbone for persisting object to server. The default are defaults values for model attributes.
Rendering the view
The most interesting things in Backbone.js app is happening in Views. Add new file to `views` folder - FeedbackView.js.
The skeleton of view would look like this:
var FeedbackFormView = Backbone.View.extend({
className: 'row',
render: function () {
return this;
}
});
This view, does do nothing. So, let make it render the template. The template would be very simple form.
There are different approaches, there to actually place the markup. It’s possible to place it in the same .html file where view starts and extract it by jQuery, it’s possible to place to separate file and load it asynchronously by $.get(). But, according to baby steps scenario - we’ll place it directly to .js file. So, inside the view we’ll add property called template.
template: '\
<form>\
<legend>Share the feedback</legend>\
<div class="control-group">\
<label>Email</label>\
<input type="text" id="email" placeholder="Your email address...">\
</div>\
<div class="control-group">\
<label>Web site</label>\
<input type="text" id="website" placeholder="Your website...">\
</div>\
<div class="control-group">\
<label>Feedback</label>\
<textarea id="feedback" class="input-xxlarge" placeholder="Feedback text..." rows="6"></textarea>\
</div>\
<button type="submit" id="submit" class="btn">Submit</button>\
</form>\
',
And render method, would be:
render: function () {
this.$el.html(this.template);
return this;
}
First test
Basically, we are ready to see some results. Modify the target view by adding references to model and view.
<script src="/scripts/src/models/Feedback.js"></script>
<script src="/scripts/src/views/FeedbackFormView.js"></script>
<script src="/scripts/src/apps/FeedbackFormApp.js"></script>
Fire up the application and go to target page. You should be able to see something like this (for styles I use Twitter Bootstrap here).
If you see the form on screen, it means application started properly.
Submitting the form
We enter the data into input fields and as soon as data is in-place we are ready to submit. It means we have to catch an event of `Submit` button click and store the model to server.
To explain to Backbone.js that you interested in particular DOM event, you need to add another property to view. It is called events.
events: {
'click #submit': 'submitClicked'
},
You can read it as - if click happed to element with id `submit`, call function submitClicked.
submitClicked: function (e) {
e.preventDefault();
var options = {
success: function () {
alert('Thanks for the feedback!');
},
error: function () {
alert('Opps, your feedback has not been submitted, please try again.');
}
};
var feedback = {
email: this.$('#email').val(),
website: this.$('#website').val(),
feedback: this.$('#feedback').val()
};
this.model.save(feedback, options);
}
What it does, is first of all prevent the default behavior of event. So, the form would not be actually posted to server. Second, it prepares the options object’s with success and error handlers. After we initialize all attributes with actual values from corresponding inputs/textbox. And finally we call model.save().
Second test
Fire up application again. Now, if have properly set-up server side to receive the HTTP post call to `/feedback` you actually post first feedback.
From my server trace, I can see that new object is received.
Now, it’s the server job to put to storage, allocate the id etc.
Conclusions
In this first baby step, I just showed how it’s possible to adopt Backbone.js for existing apps. It does not make a lot of sense to re-write your existing code with Backbone.js, but new widgets/elements/applications could be created with Backbone, having a benefit of it’s structural approach.
I’ll go on with baby steps, showing other features of Backbone.js.